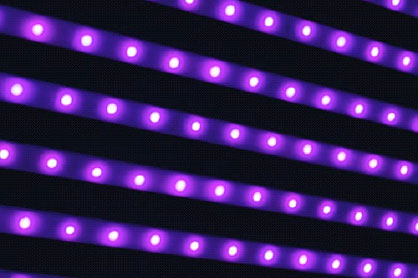
It is a flexible circuit board that is covered with tiny light-emitting bulbs and usually with a sticky backing. Read more about it here https://en.wikipedia.org/wiki/LED_strip_light and take a look into the intricacies that go into making them.
They are mainly used for under lighting, backlighting and accent areas and shapes. Due to the flexibility, they can be bent up to a 90-degree angle.
Research studies have shown that on average the strips can last up to approximately 50 000 hours. Or in terms, we can understand easier, 6 years’ worth.
As time ticks on, and those 50 000 hours count down, it’s been calculated that by the end of that period the LED’s will have only diminished to 70% of their original light output. That’s pretty good going if I do say so myself.
The strips have been designed and thought of in such a way that cutting them with a simple pair of scissors is as smooth as cutting a piece of paper. At the end of each pair of lights are 2 copper dots, cut between them and you’re good to go.
Before you cut, determine the number of lights you’ll need, how long is the strip going to be? Look for the cut line with the copper dots, this is where you will need to cut, anywhere else on the strip might result in some of the lights not working properly.
The first thing to look for when purchasing LED strips is how many lights are there per length. For maximum benefit and to achieve an overall bright display, try looking for the strip that has the most bulbs per meter or centimeter.
If they have too much of a gap between each bulb then the result might end up looking spotty and not a solid clean line of light.
It’s tricky to know which is best for what area and how many lights you’ll need for a specific space. Speak to a reputable professional company that specializes in LED strip lights and get sound advice before making any rash decisions.
A few simple steps to take before the beginning of the installation will result in a neater finish. To make sure you have all the necessary parts and components, lay them spread out on the floor in a mock installation blueprint.
Unravel the strips from the plastic covering and plugin, they should all light up. At least you know they’re working before putting in all the effort only to come out at the end in the dark.
Watch this simple tutorial video on how to measure and install strip lighting and take on board some tips and tricks.
The use of LED lighting is only just taking off, there is so much potential to the uses and evolution of this simple yet effective strip of sparkly stars. Who even has incandescent bulbs anymore?
Scott Ellyson, CEO of East West Manufacturing, brings decades of global manufacturing and supply chain leadership to the conversation. In this episode, he shares practical insights on scaling operations, navigating complexity, and building resilient manufacturing networks in an increasingly connected world.