More than a decade into the Industry 4.0 revolution, do you know how 3D scanning creates digital twins for automotive parts?

The automotive industry faces constant pressure to reduce costs and increase efficiency like other manufacturing segments. Over the last several decades, the limitation of traditional tools to design and inspect automotive parts pose a challenge to its fast-paced growth.
Automotive manufacturers often struggle with challenges that hinder development and increase unforeseen costs. The increasing use of digital technology like 3D scanning in design, production, and inspection has yielded enormous benefits in quality and efficiency.
Automotive manufacturers often struggle with challenges that hinder development and increase unforeseen costs. The increasing use of digital technology like 3D scanning in design, production, and inspection has yielded enormous benefits in quality and efficiency.
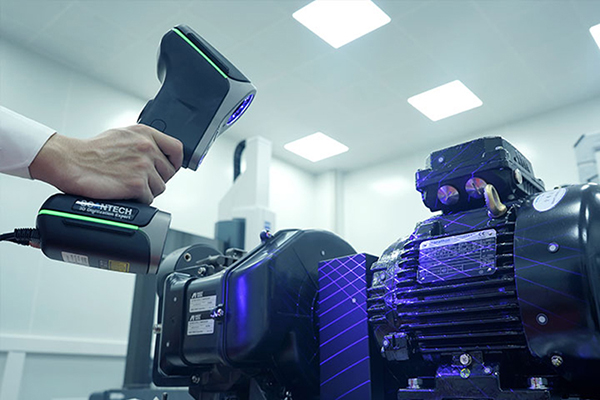
To be practical for the application in automotive industry, a 3D scanning technique must embody some features. These features include high efficiency, high precision, a large measurement volume, the ability to capture 3D data from complex surfaces or hard-to-reach areas, high adaptability to dark or reflective finishes.
The following shows us how Scantech’s 3D scanners can be applied in product development and inspection of the automotive industry.
Design of a new car
A new car begins with the understanding of future vehicles and inspirations from designers. Designers represent their ideas in hand-drawn sketches. With these sketches at hand, they draw plans on a wall on a 1:1 scale in tape drawings, which show all technical and structural features of the vehicle. Once the tape drawing is complete, they convert the 2D sketches into a 3D model. The designers who stand out from the competition are given the opportunity to represent their designs in a 1:1 scale clay model.
It takes a long time for a model to achieve the desired level of perfection as the vehicle design is a combination of creativity and technicality. From the attractive curves to the fine-tuned aerodynamics of a car body, every millimeter matters. The traditional way to repair and test mold is time-consuming, laborious, and hard to guarantee quality.
Scantech’s compact and handheld 3D scanner SIMSCAN features a scanning area of 410*400 mm and a scanning accuracy of up to 0.025 mm. The cost-effective scanner can capture the geometries of these models and convert them into point clouds that can be used for creating CAD models for test and archiving. The software ScanViewer that comes with the scanner can enable real-time demonstration of 3D data, data processing, and inspection tasks.
It is a way for designers to validate every pattern, mold, and part during the development of the vehicle. It provides a means of recording every design change with the utmost accuracy. Hence, the design process becomes more efficient and the different model versions can be presented in the living environment.
Scantech’s 3D scanning technology can enhance vehicle design process and improve engineering accuracy. In this way, designers and engineers can shorten the designing and modeling cycle.
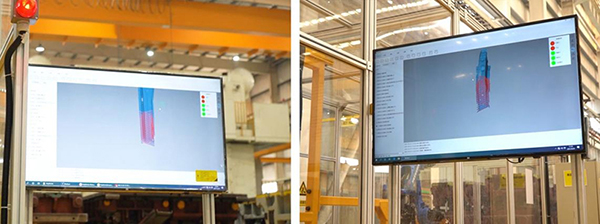
Automated Inspection of Stamping Parts
Sheet metal parts, especially stamping parts, are widely used in the automotive industry. A high volume of auto stamping parts is produced every minute. In-time and efficient inspection of these stamping parts is essential to ensure high-quality manufacturing. It is a way for automobile manufacturers to maintain an edge over competitors in the highly competitive automotive industry.
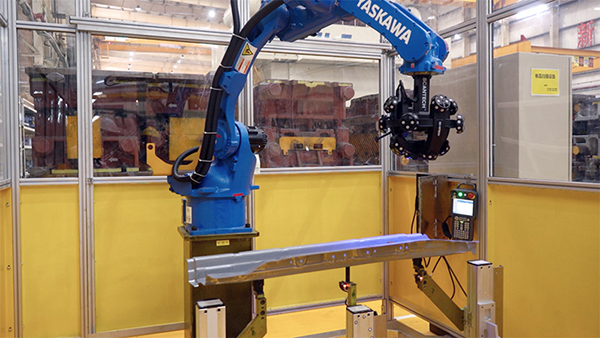
Scantech 3D solution
With the help of 3D inspection, automakers can get the deviation values between the stamping parts produced and CAD drawings. With our in-house developed automated 3D inspection system AutoScan-T, we can inspect and analyze elements such as surface deviation, hole diameter, hole position, hole-to-hole distance, and boundary of stamping parts, which delivers substantial data for reference. The use of statistics to achieve manufacturing process control can ensure the manufacturers to establish limits and identify causes for part-to-part variability, implement actions to improve process stability and eliminate the need for inspection to control quality.
Automakers rely on suppliers to provide high-quality and customized products in the process of manufacturing. It is important for them to ensure that the goods supplied meet agreed-upon requirements so that no issues arise during the assembly. This process is what we know as Supplier Quality Assurance (SQA).
Supplier Quality Engineers (SQE) travelled back and forth between supplier locations to survey quality systems, approve inspection programs, disposition initial samples and define causes for nonconforming material. Meanwhile, automotive manufacturers often subject the components provided by their suppliers to internal quality controls. This is where our 3D scanners come in.
Scantech’s portable and handheld 3D scanners KSCAN-Magic can conduct on-site inspection under harsh conditions. It is engineered with five working modes, including large-area scanning, fine scanning, deep-hole scanning.These functions ensure that the KSCAN-Magic can tackle various 3D scanning tasks with excellent high quality. It can easily capture data of complex surfaces and narrow spaces with an accuracy of up to 0.020 mm.
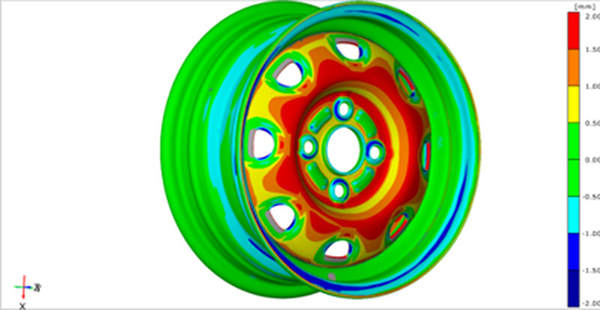
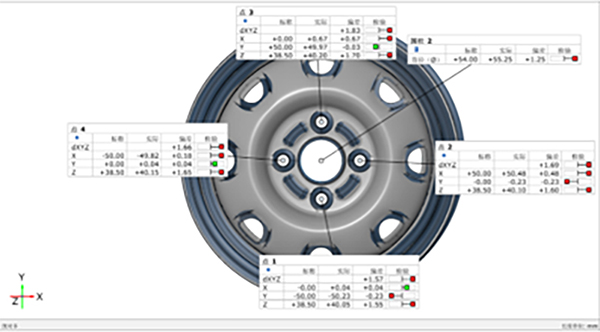
With KSCAN-Magic, Engineers can first check the geometries for the boss wheel to find if there are some deviations from the original specifications. Their functionality can be further inspected by measuring the component in different statues. With intuitive 3D data captured by 3D scanner and reports generated with a few clicks, engineers can identify issues at an early stage and ensure the components work reliably during the final assembly.
Still have questions? Ask the 3D scanning experts!
At this point, you may still have questions about how 3D scanning can be used in your daily work and how can it benefit your business. Don’t hesitate to ask our experts for more information. Our professional and dedicated teams are willing to help you find the best 3D solutions for your business. Contact us today.
As manufacturers offer more customization than ever before, managing product complexity has become a critical challenge. Tune in with Dan Joe Barry, Vice President of Product Marketing at Configit, who explores how companies are tackling the growing number of product configurations across engineering, sales, manufacturing, and service. He explains how Configuration Lifecycle Management (CLM) helps organizations maintain a single source of truth for configuration data. The result: fewer errors, faster quoting, and the ability to deliver customized products at scale.