Planning to install new replacement exterior doors in your home? Continue reading below to learn about everything involved in the process.
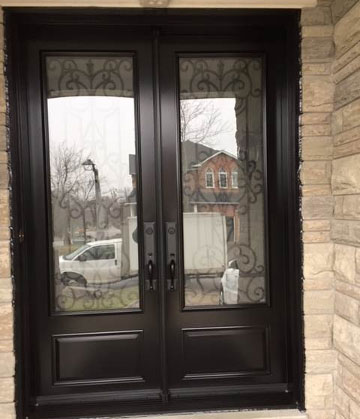
Your entry doors are the most vulnerable components in your home due to the essential role they play. These doors are opened and closed many times a day, compared to the windows, and it is the entry to the house. They also give the first impression about your home to visitors. To keep the house and the family members safe, and ensure they play the role they are supposed to play, it is essential to ensure that the doors are correctly installed.
Fitting a front door is not a challenging task for those who have tried to install one. However, we will consider some factors like security, waterproofing, energy efficiency, and durability for long lasting entry doors.
Ensure the door slab and the preassembled jamb are quality. The door should also fit well in the opening, and it can be about one inch bigger than the initial measurements in height and width. If you notice that the wall plane is to some extend out of plumb, fix the door plumb, and adjust the casing. If the difference is more significant than that, change the wall before you hang the door.
The sides of the opening should be on a plane with the wall. Have you checked the rough sill, because it is essential for you to review? When installing interior doors, it is different because, for exterior doors, the integral sill should sit level. Ensure that the sill is also supported across its width. If you are thinking of shimming the seal, also note that a shim can be a good entry for water.
Suppose you want to traditionally flash a rough sill with tilted sides, ensure that the interior curb adjusts well with the finished flooring. Although customs pans are expensive, you can get adjustable plastic ones. These do not work well with other types of sill configurations, and they easily crack. To prevent this, you can use a flexible self-adhering flashing tape to make it more durable.
Since some sills come with hollow or recessed areas, you should look at the bottom of the entry doors to ensure that you fix the caulk to a point it will make good contact. Make the sill clean and dry, and smear a thick bead of caulk over the whole width. Silicone is recommendable because if you want to replace it years later, you peel off the old caulking, and it is also flexible. The two ends are some areas prone to leaking and need an extra caulk.
You can refer to the margin between the jamb and the exterior doors when shimming the strike side. When you install shims at the top and bottom, the head jamb and sill will be pushed over, and this alternatively straightens both ends of the hinge jamb. For added security, shim behind the lockset strike.
Look for areas you will need to drill for deadbolts and avoid putting shims and nails on those areas. Since the frame opening keeps moving because of constant opening and closing, avoid shimming between the head jamb and header. This allows the entry doors to operate well, and the jamb also stays straight. Shining the head jamb temporarily, making the exterior casing tighter, and later detaching the shims with the case held helps to hold the head jamb straight. You can also do so by drilling in some galvanized finish nails through the jamb and holding the jamb straight by using the nails’ friction until you are done with installing the trim.
After ensuring that the door is firmly held in the opening and operating, use a razor knife to cut off the excess shim material. Before the caulk dries, ensure that the seal has enough support anywhere that it looks like it might flex when somebody accidentally steps on it. Now finish by installing the lockset. The last step is the air-seal. It makes your door fit snugly and make sure that no air is lost or enters the room unexpectedly.
Air-tight sealed exterior doors play a key role in enhancing energy efficiency in your home.

Industry in Transition: The Forces Reshaping Manufacturing
As manufacturers offer more customization than ever before, managing product complexity has become a critical challenge. Tune in with Dan Joe Barry, Vice President of Product Marketing at Configit, who explores how companies are tackling the growing number of product configurations across engineering, sales, manufacturing, and service. He explains how Configuration Lifecycle Management (CLM) helps organizations maintain a single source of truth for configuration data. The result: fewer errors, faster quoting, and the ability to deliver customized products at scale.
Get In Touch
Google news and SEO compliant, Industry Today’s state-of-the-art digital media platform offers bespoke media campaigns that target key decision makers and buyers to achieve your marketing and promotional goals.
![]()
Contribute
Showcase your brand and promote your business to our highly targeted audience. We offer detailed Google Analytics with measurable ROI to assure success. Submit your content for review by our Editorial team who will contact you to discuss the project further.
About Us
Reach Your Targeted Audience and Grow Your Business. Learn more About Industry Today.
Contact Us

© 2026 Industry today. All Rights reserved.